Mobile App (JobPro2Go)
JobPro2Go gives offline remote users the ability to log time, costs/expenses/parts, notes and documents (inc photos and signatures) against jobs on an iPhone or iPad. The job in question can then be billed back to the customer from head office with all relevant costs accounted for. Check out the screenshots below for a look at our JobPro2Go app.
JobPro2Go is ideal for remotely logging job details for areas like repairs, servicing, maintenance, meetings, shipping, construction, engineers, contractors, etc
JobPro2Go features
- Access data offline and sync up new data when possible
- Sync down: Pull down an up-to-date list of your job related data to log time, expenses and other areas against those jobs.
- Log time against jobs. Ideal for areas like remote meetings, repairs, maintenance work or any work out of the office.
- Log expenses against jobs. For example, parts, consumables or any other costs or expenses. Select from the list of default products/services pulled down from the Products module on the server.
- Attach new documents to jobs. A document can be any type of file including photos and signatures captured on the device. This functionality is ideal for getting customer signatures, taking photos of work done, adding audio recordings or attaching any type of document accessible from the device.
- Attach notes to jobs so all data relating to remote work done on jobs gets sent back to the main server.
- Sync up: At any stage sync up new data to the server.
- View a list of products and their main image/document from the main server. Ideal for viewing product documentation or manuals or just to see an image of a particular product/part.
- Make phone calls direct from job records.
- Send SMS messages direct from job records.
- Send emails direct from job records.
- Interact with Google Maps.
- Easily customizable if needed.
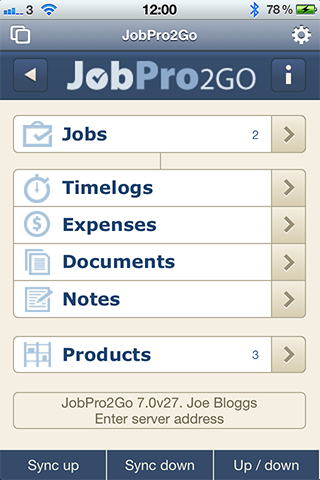
JobPro2Go Home Screen
For example there is currently 2 jobs assigned to this user and 3 products/services that can be selected on jobs. Pressing the ‘Sync up’ button will push all details back to JobPro and remove them from your iPhone. Pressing the ‘Sync down’ button will pull down a list of any jobs that have been assigned to you as a user.
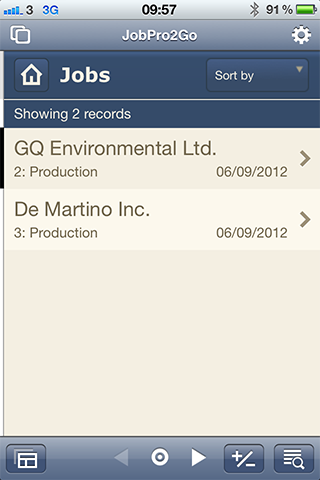
Jobs List
When you select the Jobs module you will be presented with the list of jobs that you as a user have been assigned.
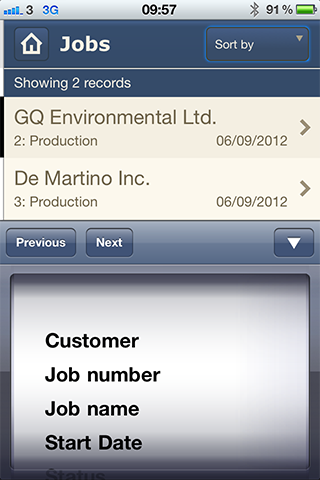
Jobs – Sort List Options
From within the jobs module you can also choose to sort the job list by areas like customer, Job number, job name or start date.
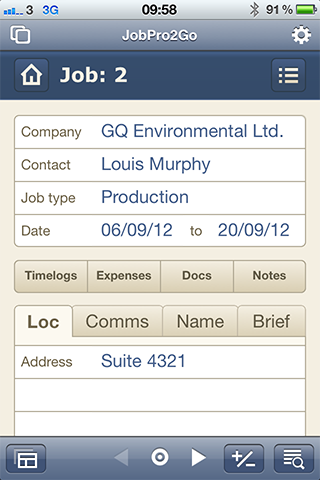
Jobs – Job View
Once you have selected the job you are interested in you will be presented with this view. Here you can view various details about the job including job location with a map (internet connection required), contact information, the job name and job brief. This is where you will also create timelogs, expenses, documents and notes.
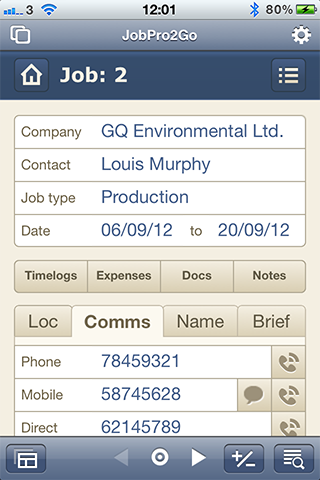
Jobs – Communications View
Here we are viewing the contact information relevant to the customer for whom the job is for. You can make a call, send an email or initiate texting to your customer from here.
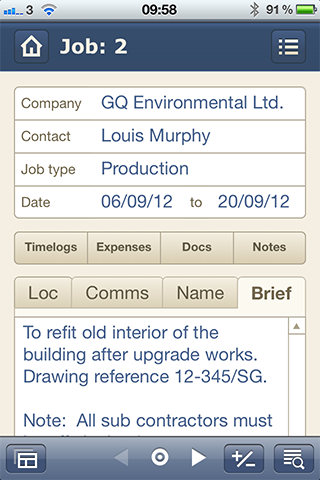
Jobs – Job Brief
View the full job brief for the relevant job.
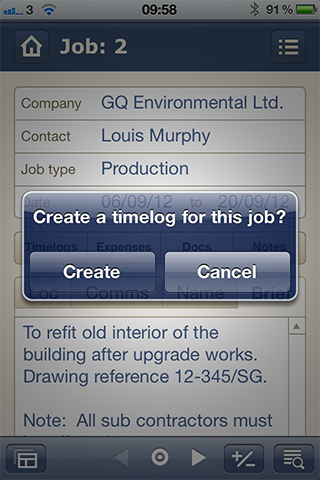
Time Logs – Create
Here we have just pressed ‘Timelogs’ and are being asked for confirmation. If there are already timelogs present you will be asked if you would like to view current timelogs for this job or create a new one.
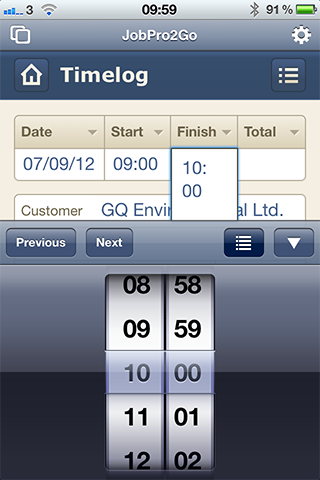
Time Logs – Entry View
We have confirmed we want to enter a timelog against this job, we have accepted the default date and set the start time, we are now just about to set the finished time. JobPro2Go will then work out the relevant time to charge to the job..
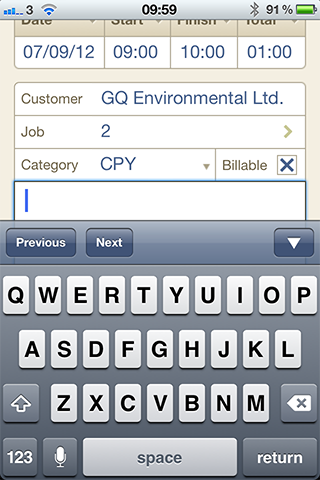
Time Logs – Enter comments
Here we can enter a comment to go with the timelog – this usually is a description of what work was carried out for the time being logged.
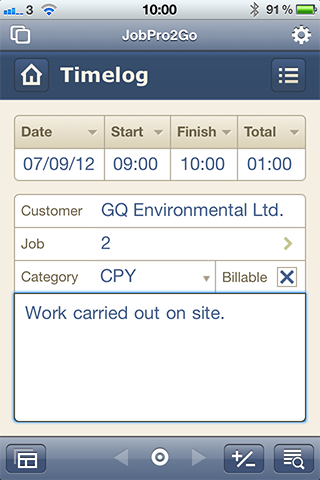
Time Logs – Finished View
Here is the finished timelog. Note the timelog is, by default, set to be billable back to your customer but that as well as other details like the category can be changed by the remote user.
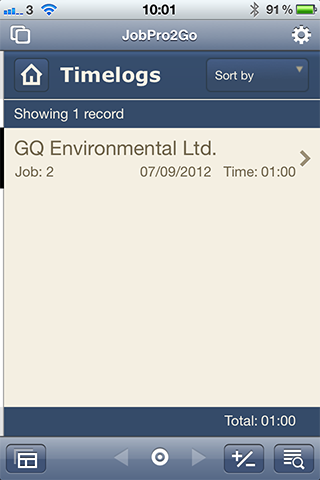
Time Logs – List
Here is a list view of all timelogs entered. Only one in the case of this job.
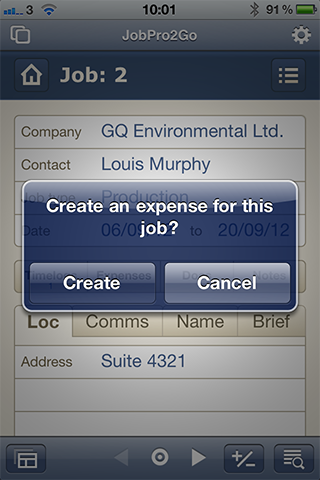
Expenses – Create an expense
From within the job we have just pressed ‘expense’ to log an expense incurred on the job or to assign a piece of stock against the job for subsequent bill back to the customer. This functionality is ideal for logging products or parts used on a job for example and stock gets updated back at the relevant location in the main system. A stock location can be a vehicle for example.
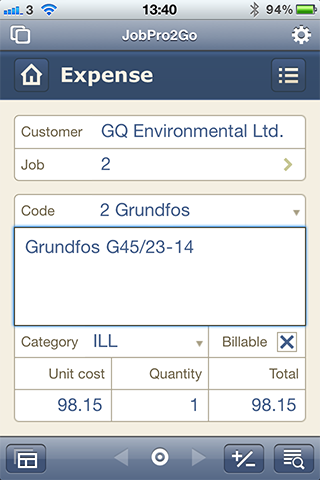
Expenses – Finished View
We can now see that we have chosen to add an item of stock against the job. The item is also set to ‘billable’.
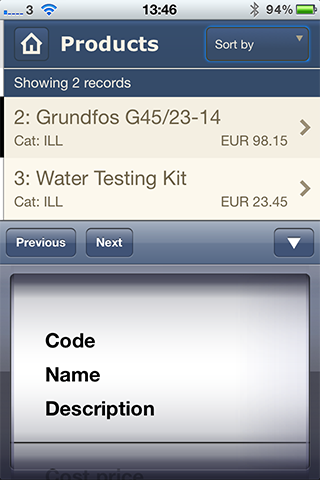
Products – List
Here we are looking at the product list view showing the sort options.
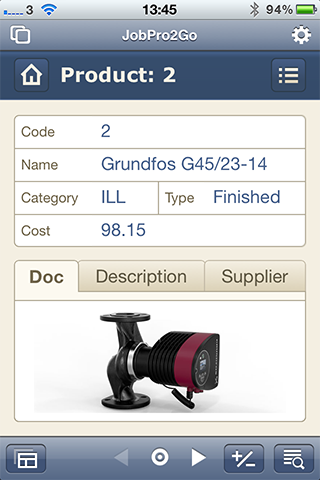
Products – Product View
Here we are in a product view looking at a stock product and its associated details. In this case the document is an image but it could for example be a PDF document that the user can click on and view. Ideal for viewing instructions in relation to the part/product.
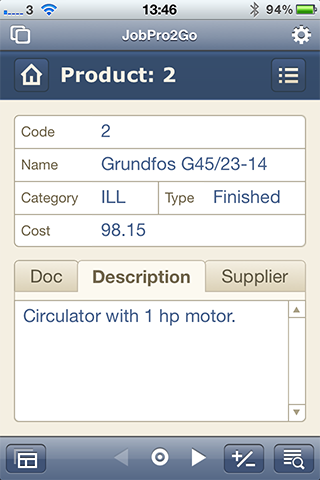
Products – Description View
Here we are in a product view looking at the product description.
Products – Supplier View
Here we are in a product view looking at supplier related details.
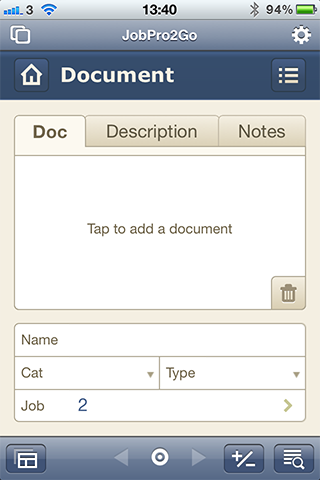
Documents – Add a document
We are now in the documents module landing page, simply tap to add a document.
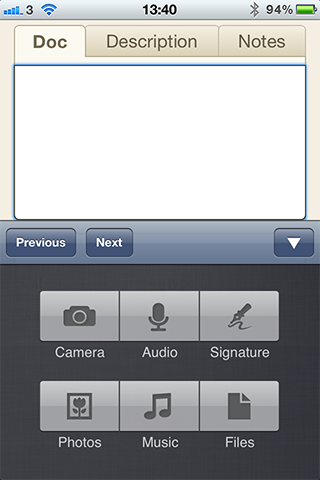
Documents – Select document type
Once you have tapped to add a document you are presented with this screen where you select the type of document. It could be a photo of work carried out, a signature captured from a customer, an audio recording or any file on the device.
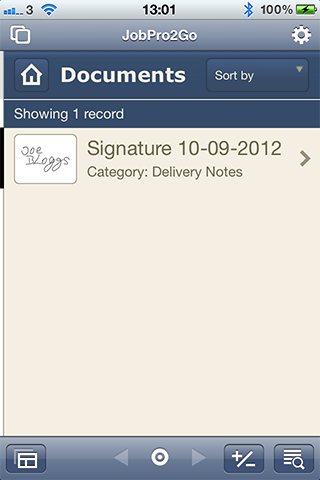
Documents – List
We are now in document list view showing all documents linked to jobs. These will be pushed back to the main JobPro database on sync.
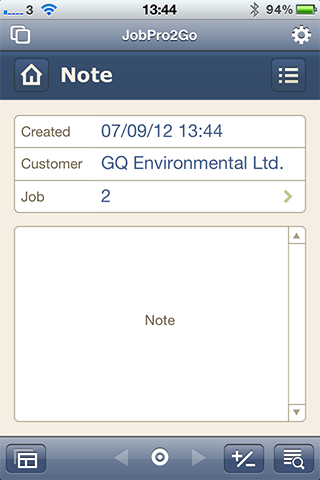
Notes
We are now in the Notes module within a job where users can create multiple notes linked to a job.
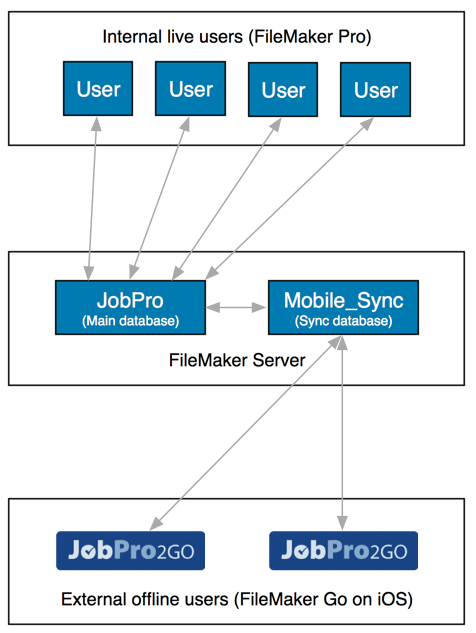
Database Structure